2025 How to Choose Acoustic Foam for Soundproofing Your Home Studio
When it comes to creating a high-quality home studio, soundproofing is an essential factor that can greatly influence both audio production and overall comfort. Among various soundproofing materials available, acoustic foam has gained significant attention in recent years. According to industry reports, the global acoustic treatment market is projected to reach $4.68 billion by 2025, largely driven by the increasing demand for soundproof home studios and noise reduction solutions across a variety of sectors, including music production and gaming.
Acoustic foam plays a crucial role in managing sound reflections and minimizing unwanted reverberations, thereby enhancing sound quality. It is important to understand that not all acoustic foam products are created equal; their effectiveness can significantly vary based on factors such as density, thickness, and design. Research shows that high-density acoustic foams can drastically reduce mid- and high-frequency sounds that often cause issues in studio environments. Recognizing the specific acoustic needs of your space will enable you to make informed decisions, ultimately allowing you to maximize both sound quality and productivity in your home studio.
As the demand for professional-sounding recordings continues to rise among content creators and musicians alike, understanding how to choose the right acoustic foam becomes vital. This guide aims to provide insights into the essential factors to consider when selecting acoustic foam for soundproofing your home studio, ensuring that you achieve the desired acoustical environment for your creative endeavors.
Understanding the Basics of Acoustic Foam and Soundproofing
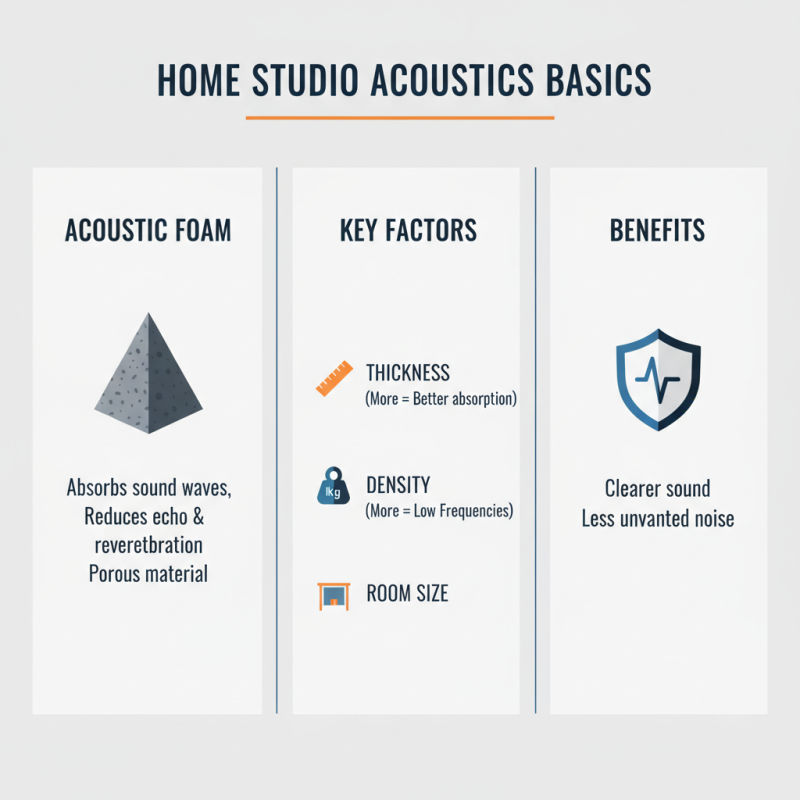
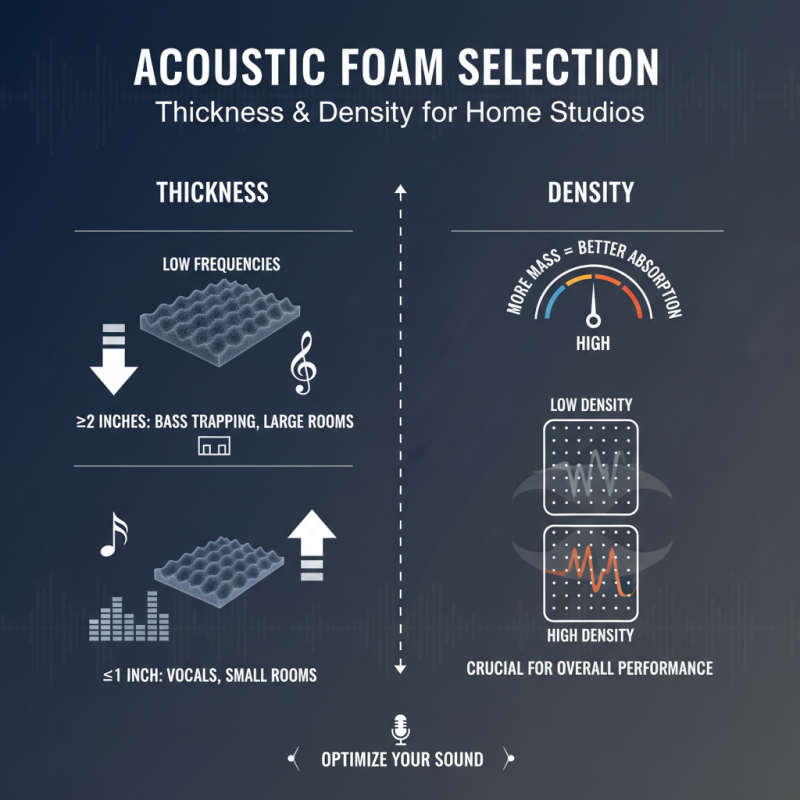
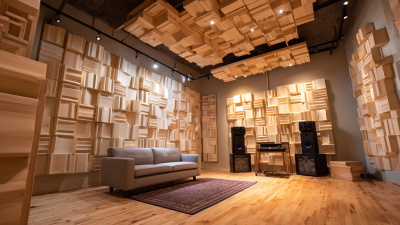
Understanding the basics of acoustic foam and soundproofing is essential for anyone looking to enhance their home studio environment. Acoustic foam is specifically designed to absorb sound waves, reduce echo, and minimize reverberation. It is made from porous materials that help to control sound reflections, making rooms sound clearer and reducing unwanted noise. When selecting acoustic foam, consider factors such as thickness, density, and room size. Thicker foam generally provides better sound absorption, while denser foam materials can combat lower frequencies more effectively.
When installing acoustic foam, think about placement and coverage. Focus on key areas that reflect sound, such as walls and ceilings, especially in corners where sound waves converge. A common tip is to use the "first reflection point" technique, where you identify spots on the walls that sound hits first when you play an instrument or speak. By applying foam in these regions, you can effectively reduce unwanted sound reflections, thus enhancing the overall acoustic quality of your studio.
Additionally, always pair acoustic foam with other soundproofing methods for optimal results. Use sealants or door sweeps to block sound leaks, and consider adding heavier curtains or carpets to absorb extra sound. This combination will help create a balanced sound environment, allowing your recordings to shine and providing a more enjoyable listening experience.
Types of Acoustic Foam: Which is Best for Your Home Studio?
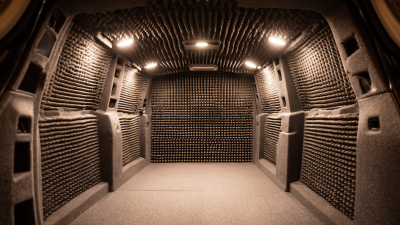
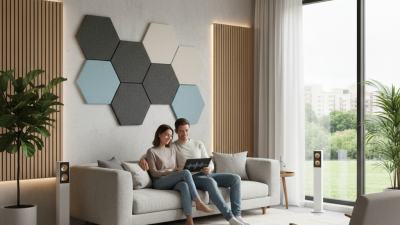
When choosing acoustic foam for your home studio, it's essential to understand the different types available and their specific functions. The most common types include wedge,扁平, and pyramid acoustic foam. Wedge foam features a triangular shape designed to effectively absorb sound waves, reducing echo and reverberation. This type is ideal for spaces where clarity is crucial, such as vocal recording or podcasting environments.
Flat acoustic foam, on the other hand, provides a uniform sound absorption surface. It is beneficial for treating larger areas and is often used in combination with other types to achieve a balanced acoustic profile. Pyramid foam, characterized by its peaked surface, not only absorbs sound but also adds a distinct aesthetic quality to a studio. Each type serves different purposes, so selecting the right one depends on your studio's specific acoustical challenges.
Consider the size of your studio and the types of sound you wish to control. For smaller spaces, combining wedge and pyramid foam can create an optimal sound environment without overwhelming the area visually. Larger studios might benefit from a strategic arrangement of flat foam panels to balance sound across the entire room. Ultimately, the best choice will align with both your acoustic needs and the visual style you aim to achieve in your home studio setup.
2025 How to Choose Acoustic Foam for Soundproofing Your Home Studio - Types of Acoustic Foam: Which is Best for Your Home Studio?
| Type of Acoustic Foam |
Density (kg/m³) |
NRC Rating |
Ideal Use Case |
Thickness (inches) |
| Open Cell Foam |
30 |
0.85 |
Recording Studios |
2 |
| Closed Cell Foam |
50 |
0.75 |
Home Theaters |
2 |
| Pyramid Foam |
20 |
0.95 |
Professional Studios |
3 |
| Wedge Foam |
25 |
0.90 |
Home Recording |
1.5 |
Placement Strategies: Optimal Layout for Maximum Soundproofing
When designing a home studio for optimal soundproofing, the placement of acoustic foam is crucial. Industry research indicates that strategic positioning can significantly enhance the acoustic performance of a space. For instance, placing foam panels at the first reflection points—where sound first reflects off walls before reaching the listener—can reduce echo and improve clarity. The Morton Report estimates that addressing these reflections can lead to a 30% reduction in unwanted reverberation, contributing to a more controlled sound environment.
In addition to first reflection points, the arrangement should consider the entire room's layout. Positioning foam in corners—known as bass traps—can effectively mitigate low-frequency buildups, which are common in home studios. According to the Audio Engineering Society, this method can lead to a 40% improvement in low-end frequency response. Furthermore, ensuring that foam panels are distributed evenly across walls and ceilings minimizes sound wave interference, promoting a balanced acoustic profile. By utilizing these placement strategies, you can maximize the effectiveness of acoustic foam, thus creating a conducive environment for music production and sound recording.
Budgeting for Acoustic Foam: Cost Considerations and Value Options
When it comes to soundproofing your home studio, budgeting for acoustic foam is a crucial consideration that can significantly impact your overall setup. Acoustic foam panels vary widely in price, and understanding your budget can help narrow down the options that provide the best value for your needs. It's important to assess how much you're willing to spend, as this will influence both the quality and quantity of materials you can purchase. Generally, while higher-priced foam tends to offer better sound absorption and longevity, there are still budget-friendly options that can effectively minimize unwanted noise.
Furthermore, when evaluating the cost of acoustic foam, consider the long-term value of your investment. Cheaper alternatives may initially appear appealing, but they often require replacement sooner or may not perform as well as higher-quality products. Assessing the foam's density and thickness is essential, as these factors play a significant role in sound absorption capabilities. By focusing on the right specifications and understanding the importance of balance between cost and effectiveness, you can make informed purchasing decisions that maximize your audio quality while maintaining your budget.
 '
'
