What Are the Top Types of Tile Photo Frames?
A Tile Photo Frame can turn a family photograph into a small, tactile feature: glazed ceramic catches the light, while mosaic pieces add visible texture. The options vary in finish, weight, color, and mounting style. Some use a tiled border around a separate photo opening; others print an image directly onto ceramic. The difference matters when you are choosing a frame for a desk, a shelf, or a damp-prone room.
Grand View Research valued the global home décor market at USD 696.4 billion in 2023 and forecast 4.4% annual growth from 2024 to 2030. This broad market figure does not measure tile photo frames specifically, so it should be read as context, not proof of demand for this product. Interior designer Nate Berkus has said, “Your home should tell the story of who you are, and be a collection of what you love, brought together under one roof.” His words concern home design generally, not tile frames, but they offer a useful lens for choosing one. Small details matter. This guide compares popular types, including ceramic, mosaic, hand-painted, and photo-printed designs. It also considers durability, display needs, and how the finish works with the photograph. A beautiful frame can still feel wrong in a room. That part is easy to overlook.
What Defines a Tile Photo Frame?
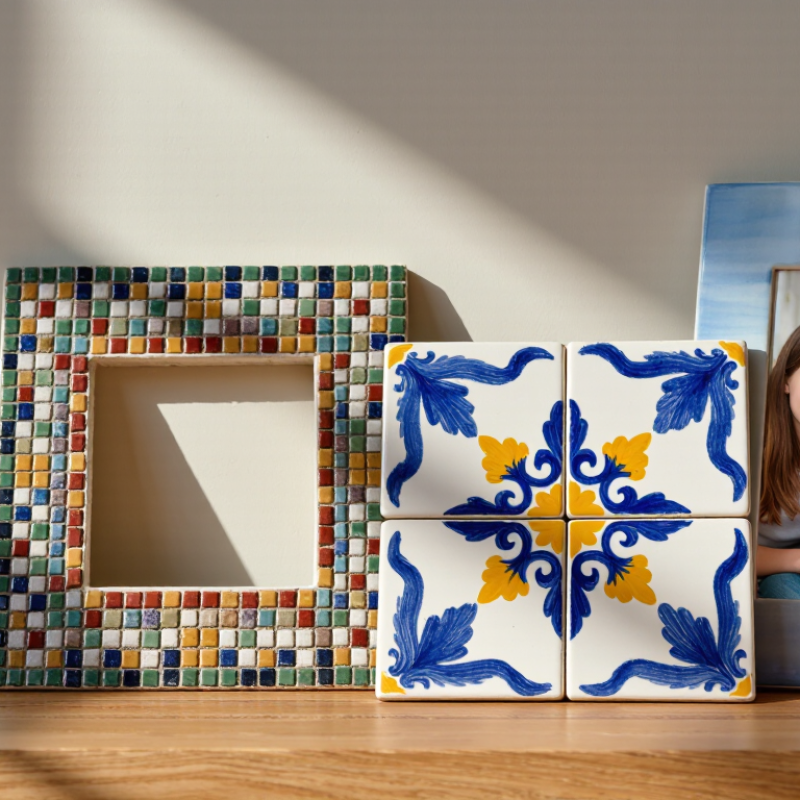
A tile photo frame is defined by real tile serving as a visible part of the frame, not by a printed tile pattern. It may use one glazed ceramic tile as a backing, or small tiles arranged around a photo opening. The tile provides a hard, wipeable surface; a separate backing and secure hanger carry the load. This distinction matters. A decorative tile alone is not automatically a safe frame.
Material choice affects weight and edge finish. ISO 13006:2018 classifies dry-pressed ceramic tiles by water absorption: Group BIa absorbs no more than 0.5%, while Group BIII absorbs more than 10%. These figures describe tile classification, not frame strength. The Tile Council of North America’s Handbook also treats tile installations as layered assemblies, emphasizing the role of substrate and setting materials. For a frame, that means checking the backing, adhesive, and hanging hardware together. A neat grout line can still conceal a weak bond.
Tips: Feel the edges before mounting. Glazed corners may chip, and a heavy tile can pull from a lightweight hanger. Use a rigid backing, keep the photo opening slightly smaller than the image, and test the assembled frame on a flat surface. It is easy to overestimate how much an adhesive can hold.
What Defines a Tile Photo Frame? Tile Types by Water Absorption
A tile photo frame is defined by its tile surface and how the photo is attached or displayed. Ceramic tiles are classified by water absorption: impervious tiles absorb no more than 0.5%, vitreous tiles more than 0.5% and up to 3%, semi-vitreous tiles more than 3% and up to 7%, and non-vitreous tiles more than 7%. The bars mark each class’s boundary; they are not averages.
Porcelain and Glass Tile Photo Frames
Porcelain and glass tile photo frames bring different strengths to a display. Porcelain tiles usually have an opaque, slightly textured surface, giving a frame a warm, grounded look. Their weight can help a frame sit steadily on a shelf, though a thin backing may flex under it. It feels substantial. Glazed edges catch light, but chips are possible if the frame is dropped or knocked against a hard table.
Glass tile frames create a brighter, cleaner look. Clear or lightly tinted pieces can reflect window light and make small photographs seem more vivid. The surface wipes clean with a soft, damp cloth; abrasive pads may leave fine scratches. Glass can also show fingerprints quickly. That matters. For either material, check that the tiles are firmly set and that the rear stand or hanging hardware supports the frame’s full weight.
Consider the room and photograph when choosing between them. A matte porcelain border may suit a softly lit bedroom, while glass can work well near a bright entryway. Strong glare can hide faces, so test the placement at different times of day. Appearance alone can mislead. Tile spacing, grout color, and uneven edges all affect the final look. Handmade-style details may vary slightly from one frame to another. That variation can feel charming, or simply untidy; it depends on the image and the viewer.
Mosaic Tile Photo Frames
Mosaic Tile Photo Frames
Mosaic tile photo frames turn a small border into a detailed surface. The Tile Council of North America’s technical references use a face area of 9 square inches or less to define mosaic tile. That compact scale suits frames: tiny squares, glass pieces, or stone chips can follow narrow corners without awkward cuts. For a 4-by-6-inch photograph, a slim mosaic edge can add texture without swallowing the image. Keep grout joints even. Uneven spacing shows quickly around a small frame.
Material choice affects both appearance and care. Glass tiles catch window light, while matte ceramic gives a softer, quieter edge. Natural stone varies in color and may need sealing; test a spare piece before finishing the frame. The TCNA Handbook emphasizes choosing tile and installation materials for their intended use, a useful principle even for small craft projects.
Use a rigid backing, water-resistant adhesive, and grout suited to the joint width. Small details matter. A thick grout line can make delicate pieces look clumsy, and I sometimes find that a slightly irregular pattern feels more personal than perfect symmetry. Keep the photo removable, too, so cleaning or replacing it does not disturb the mosaic.
Hand-Painted and Decorative Tile Photo Frames
Hand-painted and decorative tile photo frames give a photograph a tactile, colorful border. Tiles may show visible brushstrokes, raised patterns, or slight variations in glaze. Those small differences make each frame feel distinctive, though they may not suit a perfectly uniform room. Small details matter.
When choosing a frame, compare its colors with the photograph and the room’s lighting. A blue-and-white border can balance a busy image, while terracotta or floral designs bring warmth to a pale wall. Check the tile edges, grout lines, and backing for secure construction. Glazed surfaces are usually easy to wipe, but textured or painted areas can collect dust. Use a soft, dry cloth and avoid harsh cleaners that may dull the finish. A bold pattern can compete with a detailed photograph, so the pairing may take a little trial and error.
Tips: Set the frame near the intended display spot before deciding. Check how the colors look in daylight and evening light, and keep it away from direct sun to help preserve its appearance.

 '
